
Hey! I'm Mayte CG, a Rive Ambassador and designer. I discovered Rive in 2022, and it transformed how I build interactive experiences. Data Binding takes that even further.
This is the second part of an ongoing series on this powerful feature. In part one, we unpacked the mental model and core concepts to ease your learning.
Now it's time to get our hands dirty.
Over the following articles, we'll explore step-by-step Data Binding mini-projects. Each one highlights a technique you can build on, remix, or expand, and includes Marketplace files to follow along or compare with the final result.
💡 Some tips before we start
Property Groups are your silent superpowers. Quiet middlemen doing the heavy lifting: running formulas, passing values, and making properties keyable. Experiment as much as you can with them: they’re key for logic that plain bindings alone can’t handle.
Use the Text + Convert to String combo to debug by displaying property values on the canvas in real-time.
Stuck with formulas? Try roughly sketching them using Rive’s virtual interface (don’t worry about accuracy at this point). Then, copy the formula text into ChatGPT for reference. Describe your goal, and use AI to debug the formula, returning a Rive syntax version ready for you to paste back in.
What you’ll build
Let’s kick things off with a simple but flexible looping button — a UI control that cycles through values step by step.
In this demo, you’ll create a character whose height increases in fixed steps, from a minimum to a maximum. Each button press grows the character by one step. After a few taps, it reaches the max, then loops back to the start.
Use cases
It’s a compact setup, but the logic is highly versatile. You can reuse it in carousels, quantity pickers, or cycling menus.
Key Data Binding features
Number properties | Boolean | Trigger | Formula converter
Set up the Artboard
Create a single artboard with the following settings:
Size: W: 332 H: 800
Background: #000000
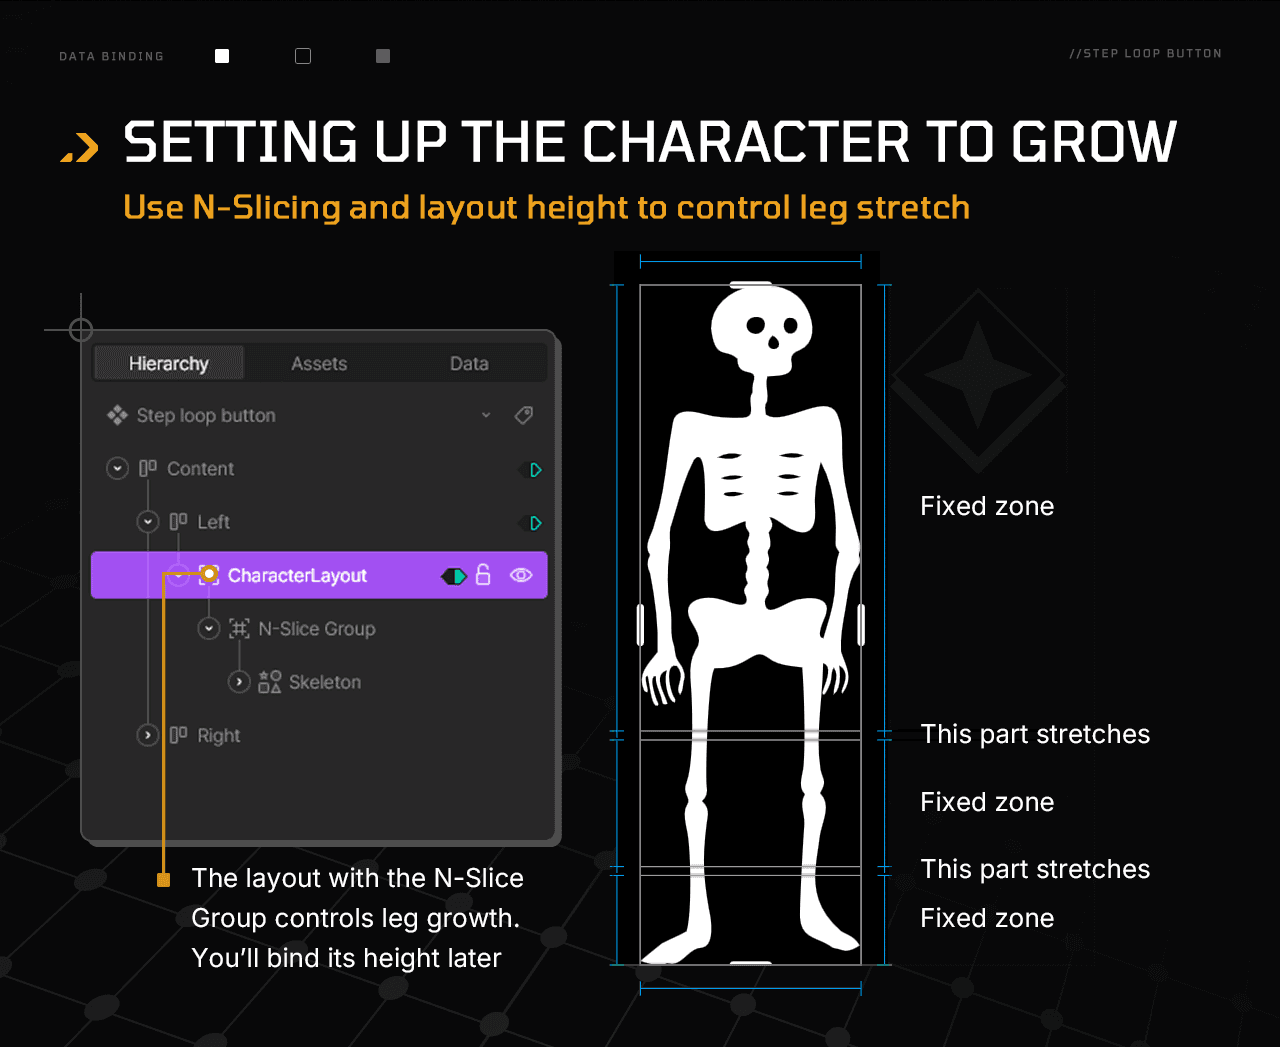
We'll work with three main elements: a simple character, a button, and a layout with an N-Slicing Group. The N-Slicing setup lets us stretch the skeleton's legs to simulate growth without using bones. (Yep. A boneless skeleton!)
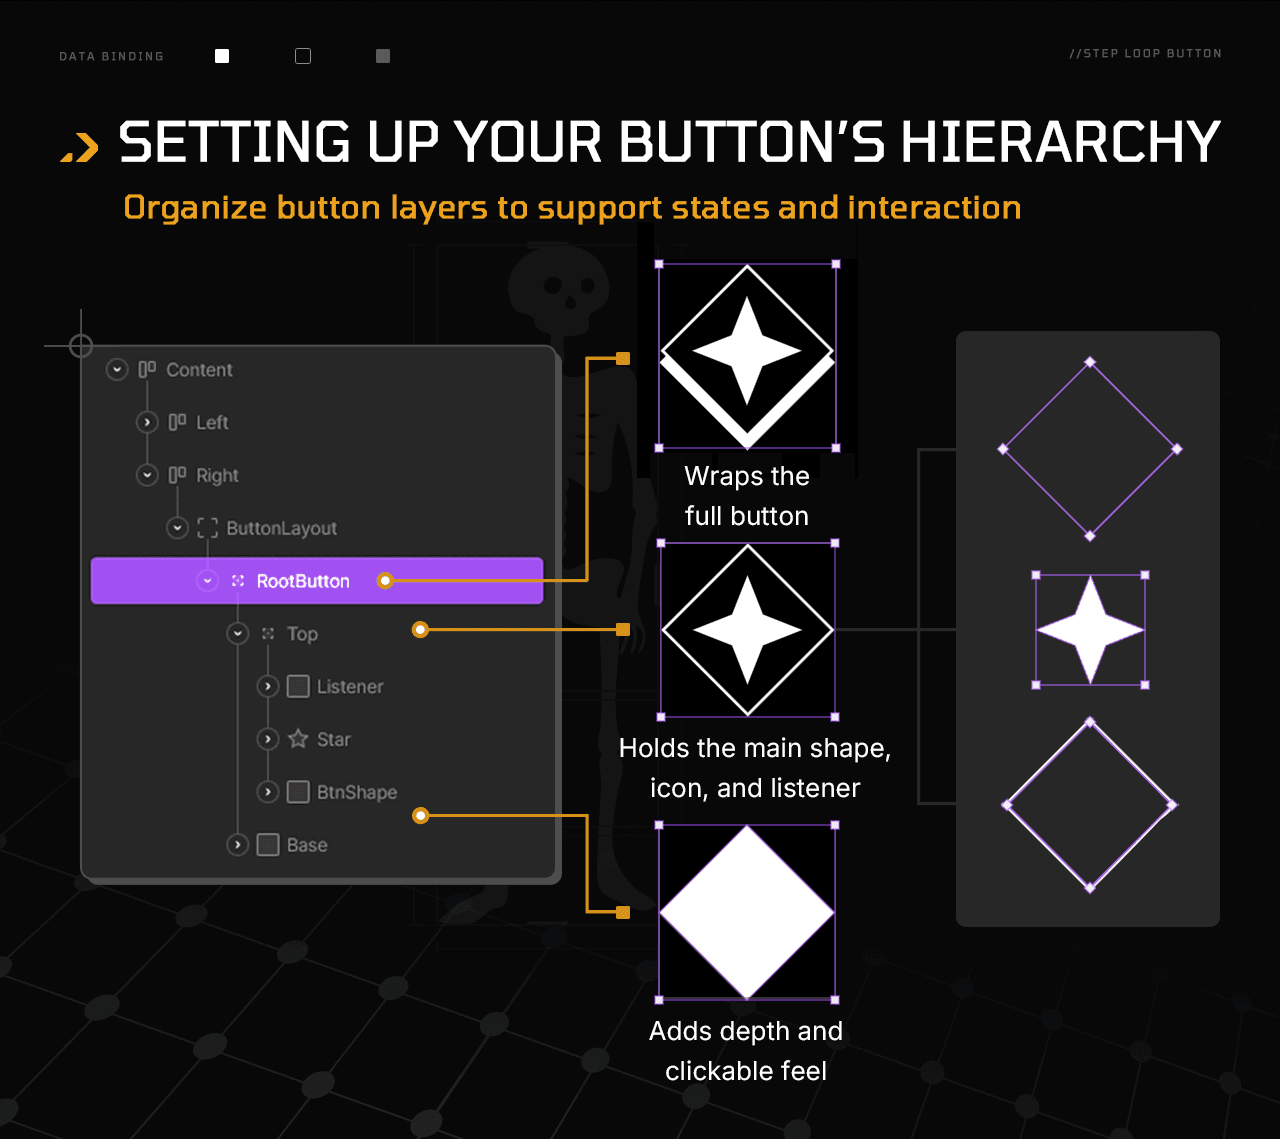
Any button design works — just keep in mind it’ll need three states: idle, hover, and pressed.
We’ll also need a Listener: duplicate the button shape, remove fill and stroke, and rename it “Listener”. It won’t do anything yet, but it’ll be ready to detect user actions later.
Grab the base file
Use this file to follow along. It includes the basic design (no data or logic yet).
Create View Models & Converters
Let’s build the brain behind the demo. We’ll start by creating the View Model and a formula converter to drive the logic. This setup controls how the skeleton grows, how far it stretches, and when it resets.
In the Data panel, create a View Model called VMMain and connect it to the artboard. Inside, add the following properties and converters:

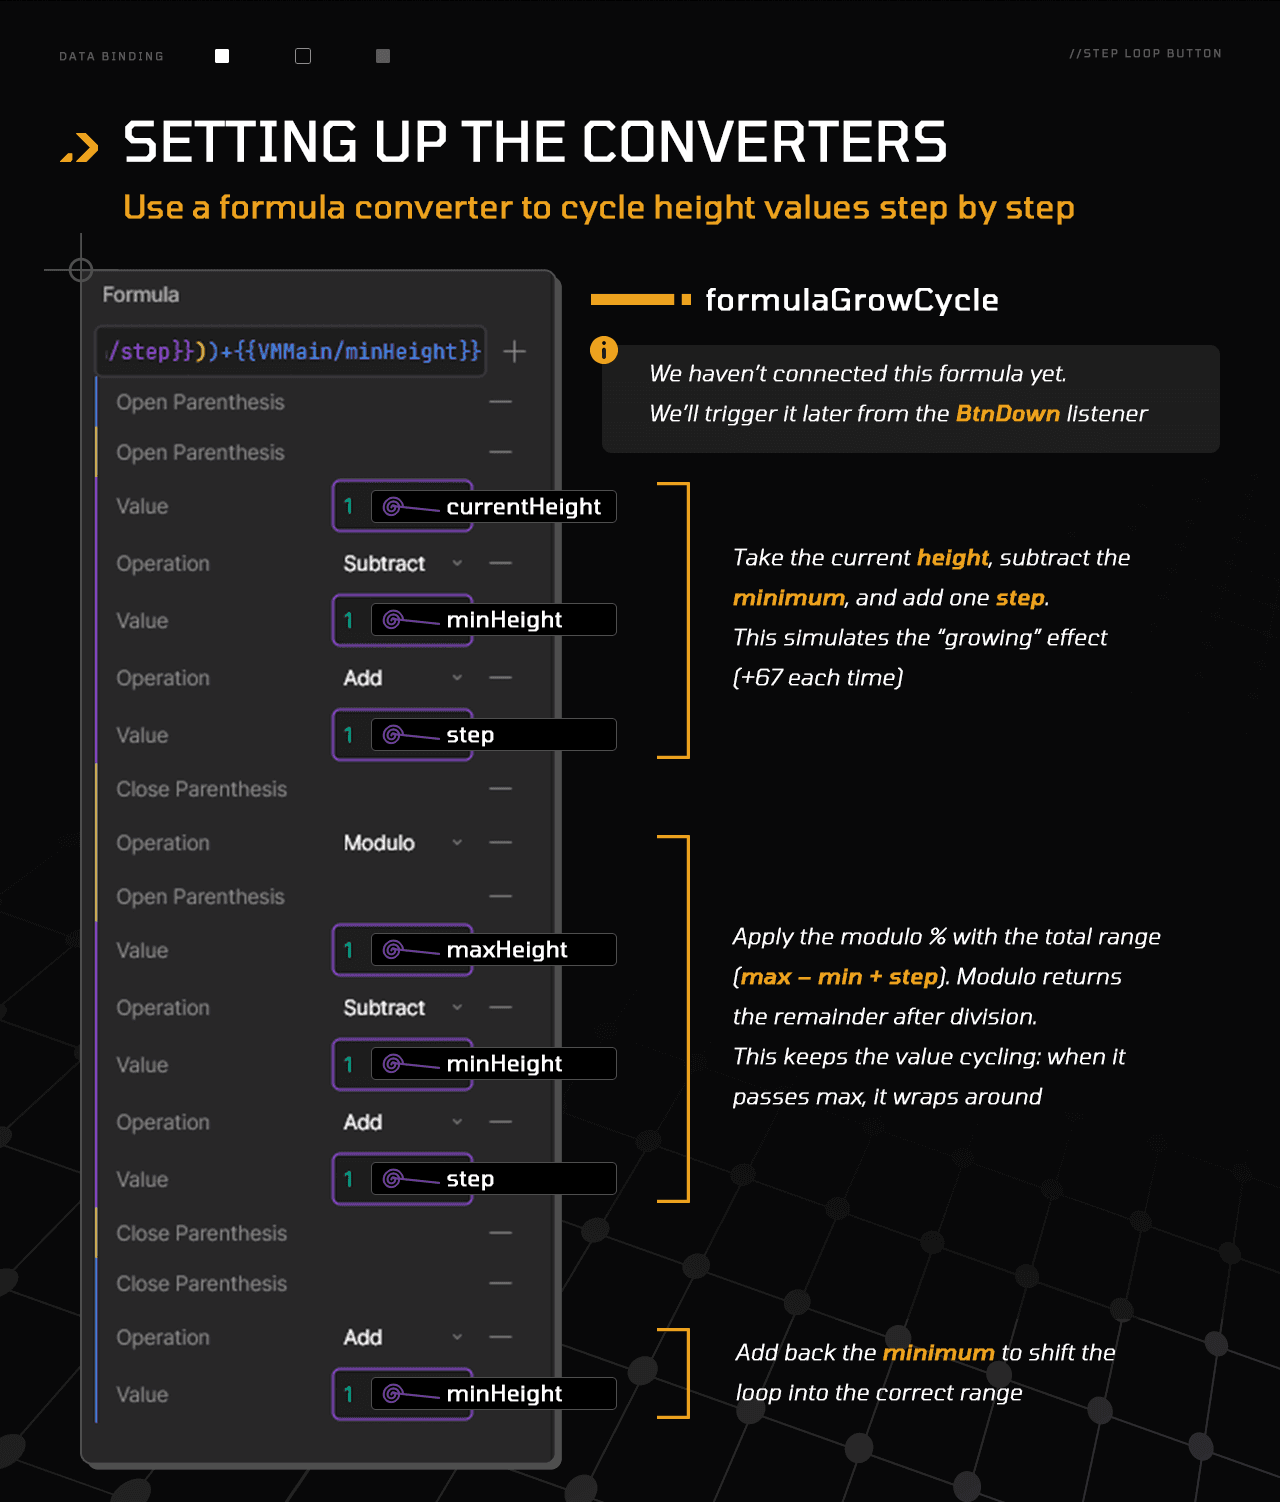
To keep things focused, I’ve set fixed values: maxHeight (800, matching the artboard’s height), minHeight (465), and step (67 — five clean jumps from min to max). The goal is to show how a button can drive a cyclic interaction between defined limits using Data Binding. Once you grasp the core logic, you can expand it into a more procedural approach. You’ll find ideas to build on this at the end of the project.
Now, let’s break formulaGrowCycle down, the converter that powers the loop:
Add functionality with State Machines
With the View Model and converters in place, it’s time to bring the interaction to life.
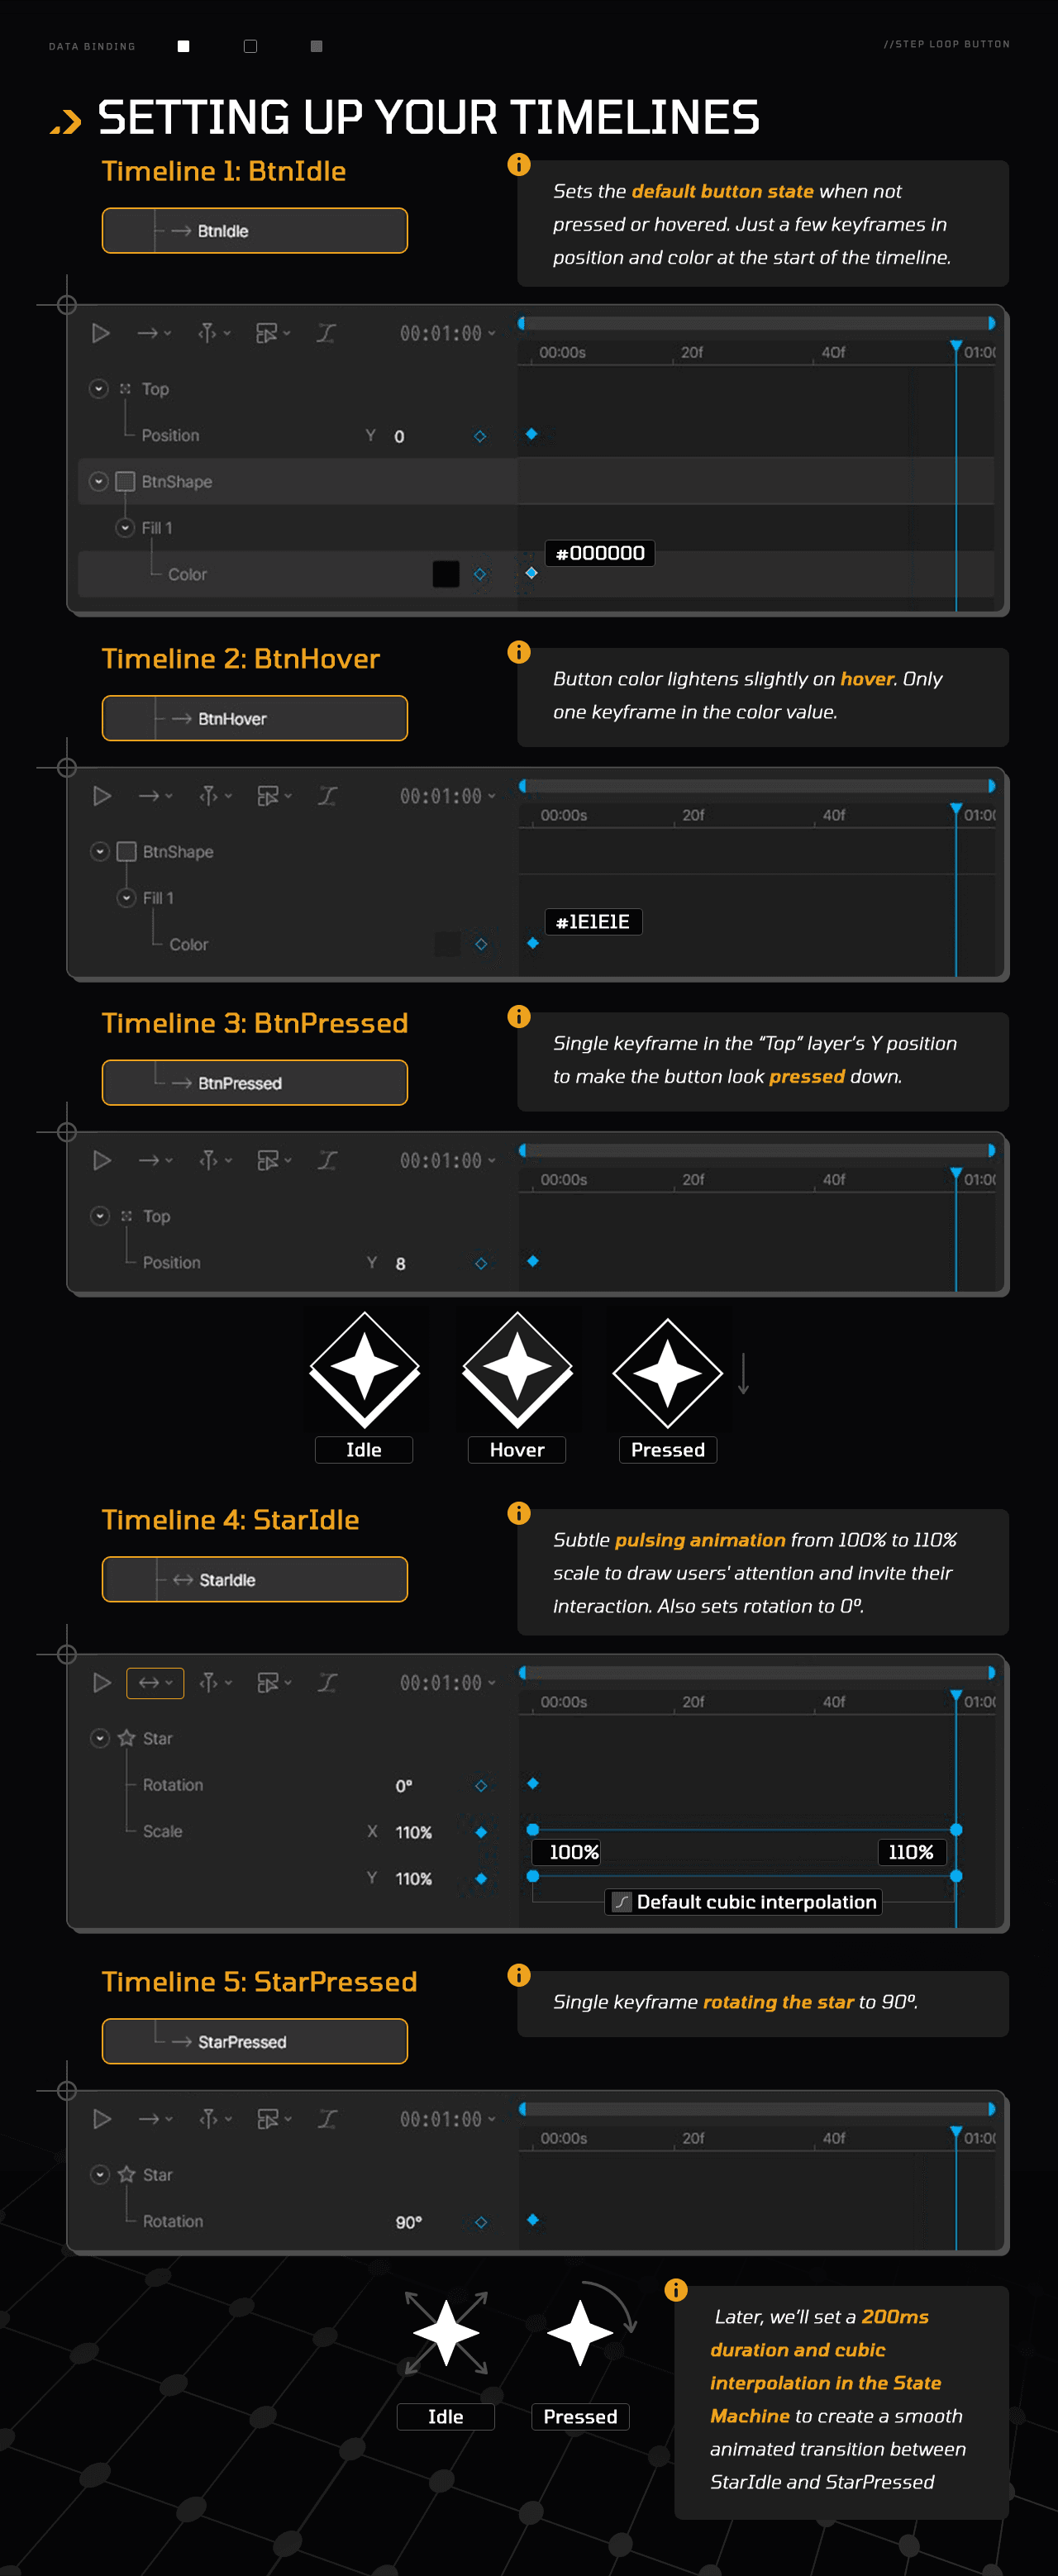
Timelines
All timelines will control button behavior:
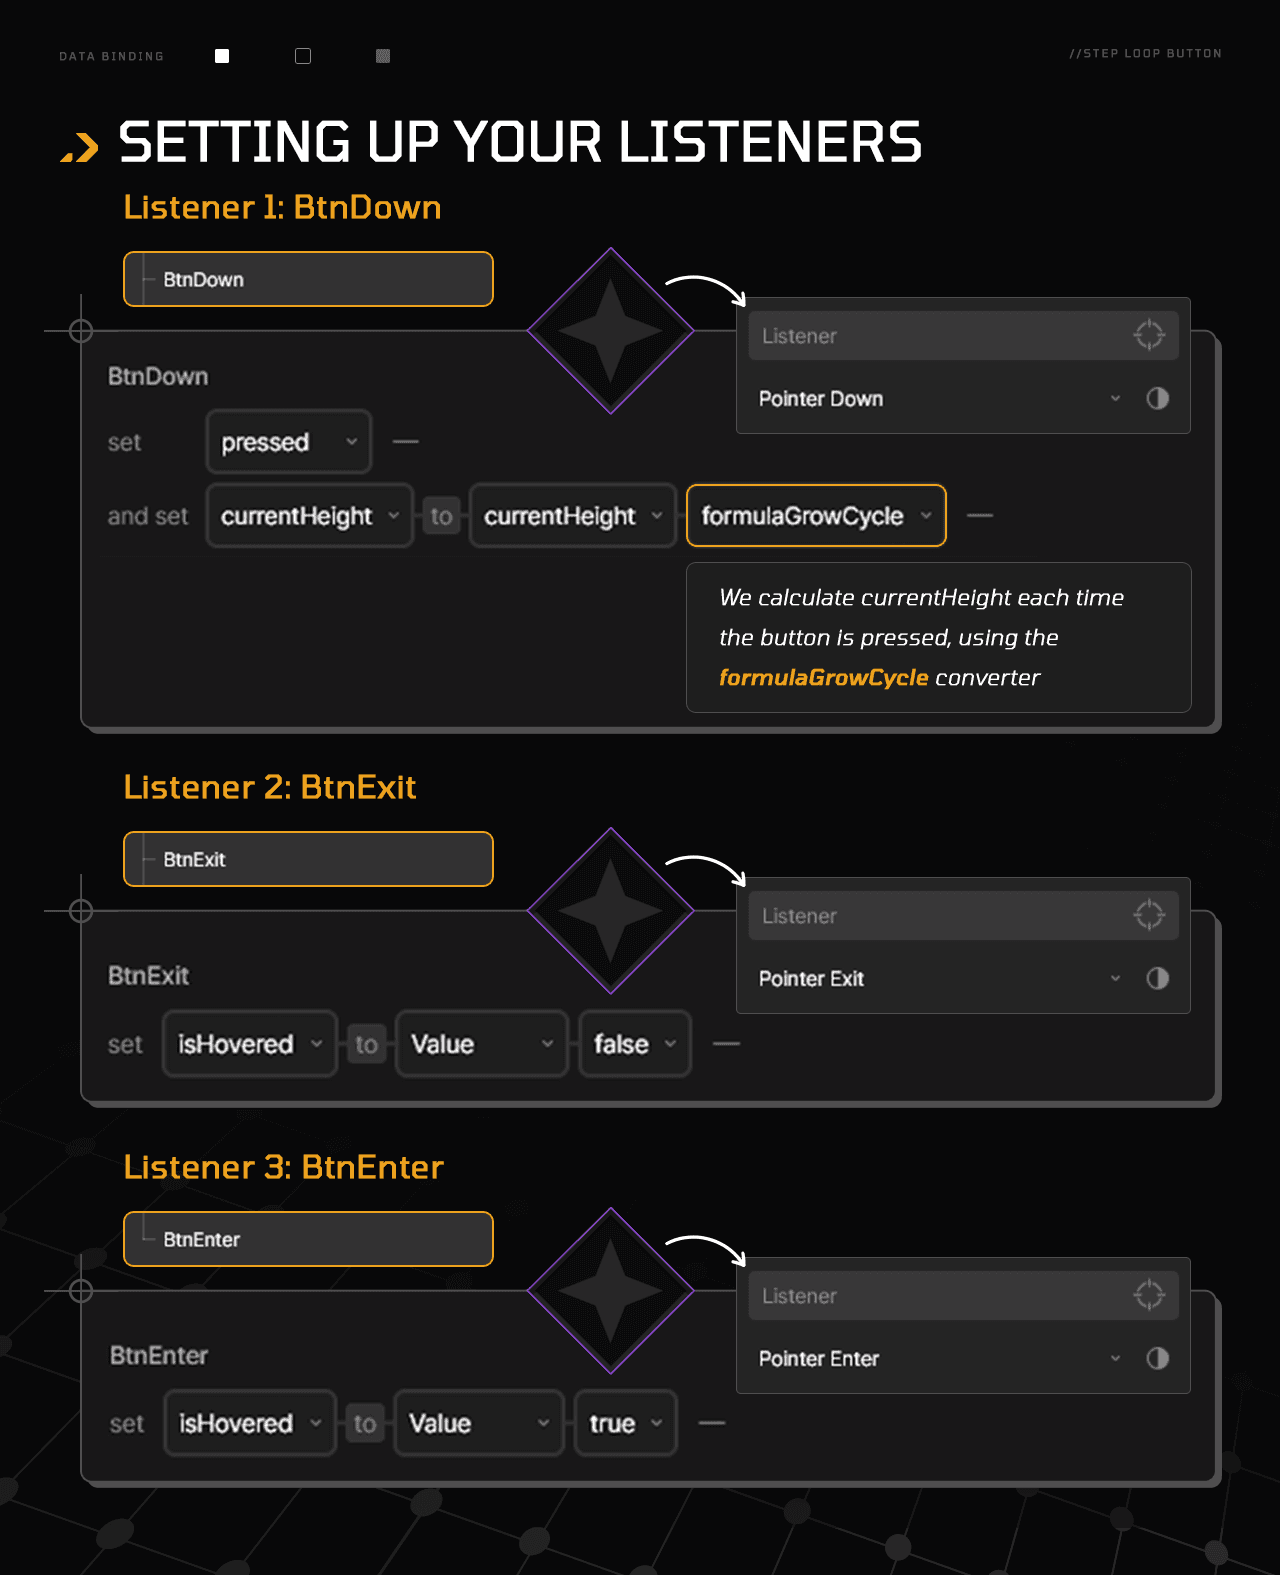
Listeners
Next, add three listeners targeting the button Listener:
State Machines
Time to wire it all up with a State Machine:
And that’s it! Hit Play, click the button, and watch the skeleton grow, one step at a time, looping back to the start once it maxes out.
Inspect & remix
Grab the final file to compare, explore, or remix.
Ready to take it further?
This project is just a launchpad; build on it and keep learning by doing.
Here are a few ideas to try:
Add a second button to shrink the size and invert the loop
Make the setup more procedural: bind maxHeight to the artboard’s height, and calculate step dynamically using a converter, so the character always grows in clean increments without overshooting.
Add an interpolator for smoother transitions (you’ll need a Property Group)
Need support? Check out Rive’s documentation, learn with the 101 Data Binding tutorials, and connect with the Community.
Join our newsletter
Get all the latest Rive news delivered to your inbox.